Jest 框架進階應用(describe、Setup and Teardown、Mock function)
一個功能底下可能有很多函式,因此我們要對它進行分組(describe);當我們想測試特定情境時,可以在測試前增加資料(Setup)並於測試後移除(Teardown);為了讓單元測試更存粹,可以透過模擬函式(Mock function)減少相依性。

這篇文章寫於 2023 年,文中的工具與版本可能已經更新,實作時請以官方文件為準。
本文目錄
如果你對 Jest 這個測試框架還一無所知,建議先看上一篇文章喔!
一個功能底下可能有很多函式,如果測試程式沒有適當的區分,那在遇到錯誤時會難以管理,因此我們要對它進行分組(describe);當我們想測試特定情境時,可以在測試前增加資料(Setup)並於測試後移除(Teardown);為了讓單元測試更存粹,可以透過模擬函式(Mock function)減少相依性。
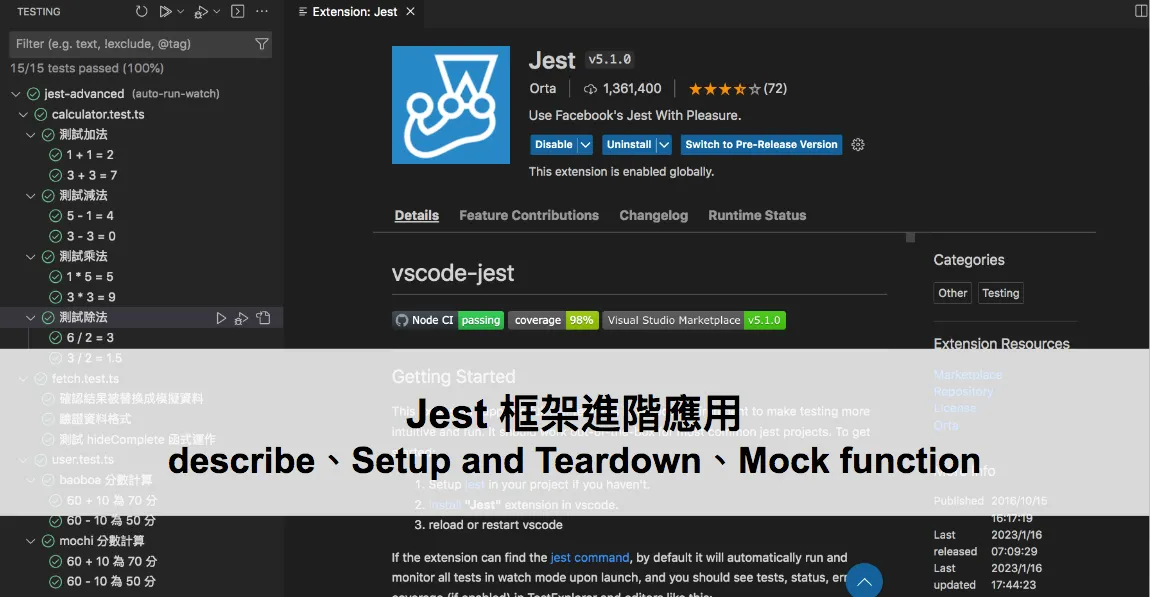
大綱

一、測試分組(describe)
二、在測試前、後要執行的任務(Setup and Teardown)
三、用 Mock Function 減少測試時的相依性
四、VSCode 的 Jest 外掛
讀者可以直接到筆者的 Github ,將專案 Clone 下來跑跑看,會更好理解裏面的邏輯(順手按個 ⭐ 更好 🤩)。
一、測試分組(describe)
比如今天我們設計一個計算機,裏面包含「加減乘除」等功能,如果要針對不同 function 做分組測試,我們可以這樣做:
- calculator.ts:計算機基礎功能(加減乘除)。
export function sum(a: number, b: number) {
  return a + b;
}
export function minus(a: number, b: number) {
  return a - b;
}
export function multiply(a: number, b: number) {
  return a * b;
}
export function divide(a: number, b: number) {
  return a / b;
}
- calculator.test.ts:分組測試計算機基礎功能。
import { sum, minus, multiply, divide } from "./calculator";

describe("測試加法", () => {
  test("1 + 1 = 2", () => {
    expect(sum(1, 1)).toBe(2);
  });
  test("3 + 3 = 7", () => {
    expect(sum(3, 4)).toBe(7);
  });
});

describe("測試減法", () => {
  test("5 - 1 = 4", () => {
    expect(minus(5, 1)).toBe(4);
  });
  test("3 - 3 = 0", () => {
    expect(minus(3, 3)).toBe(0);
  });
});

describe("測試乘法", () => {
  test("1 * 5 = 5", () => {
    expect(multiply(1, 5)).toBe(5);
  });
  test("3 * 3 = 9", () => {
    expect(multiply(3, 3)).toBe(9);
  });
});

describe("測試除法", () => {
  test("6 / 2 = 3", () => {
    expect(divide(6, 2)).toBe(3);
  });
  test("3 / 2 = 1.5", () => {
    expect(divide(3, 2)).toBe(1.5);
  });
});
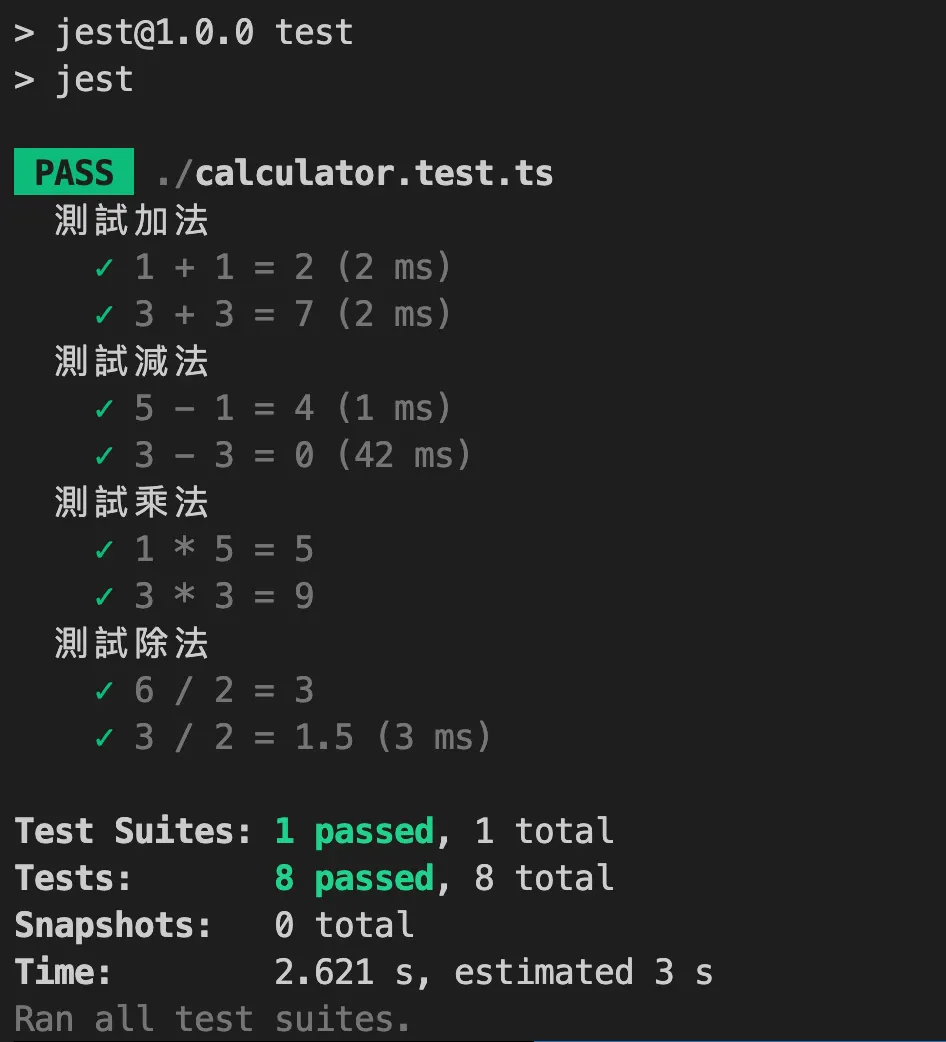
運行測試指令 npm run test,順利的話就會看到下圖測試分組的結果嚕!
二、在測試前、後要執行的任務(Setup and Teardown)
Jest 有提供 4 種函數:
- beforeAll:在所有測試開始前執行。
- afterAll:在所有測試完畢後執行。
- beforeEach:在每個測試開始前執行。
- afterEach:在每個測試結束後執行。
舉個例子,如果今天要設計「考核系統」,除了有考生外,還需要模擬出「合格」、「不合格」的情境,為了避免影響到資料庫,我們可以這樣做:
- user.ts:我們先預設的 score 的基準為 60 分,可透過 addScore、minusScore 來加減分。
export default class user {
  name: string;
  score: number;
  constructor() {
    this.name = "";
    this.score = 60;
  }
  addScore() {
    this.score += 10;
  }
  minusScore() {
    this.score -= 10;
  }
}
- exam.test.ts:利用「beforeAll」將考生的資料初始化,並透過「beforeEach」將分組測試的分數重新校正(若少了這個動作,第二個測試會沿用上一個測試的結果,會變成 70–10=60 分),測試完畢後用「afterAll」將考生資料清空。
import user from "./user";
const userDB: user[] = [];

const insertTestData = (name: string) => {
  const User = new user();
  User.name = name;
  userDB.push(User);
};

const clearTestData = () => {
  userDB.length = 0;
};

beforeAll(() => {
  insertTestData("baobao");
  insertTestData("mochi");
});

describe("baoboa 分數計算", () => {
  beforeEach(() => {
    userDB[0].score = 60;
  });
  test("60 + 10 為 70 分", () => {
    userDB[0].addScore();
    expect(userDB[0].score).toBe(70);
  });
  test("60 - 10 為 50 分", () => {
    userDB[0].minusScore();
    expect(userDB[0].score).toBe(50);
  });
});

describe("mochi 分數計算", () => {
  beforeEach(() => {
    userDB[1].score = 60;
  });
  test("60 + 10 為 70 分", () => {
    userDB[1].addScore();
    expect(userDB[1].score).toBe(70);
  });
  test("60 - 10 為 50 分", () => {
    userDB[1].minusScore();
    expect(userDB[1].score).toBe(50);
  });
});

afterAll(() => {
  clearTestData();
});
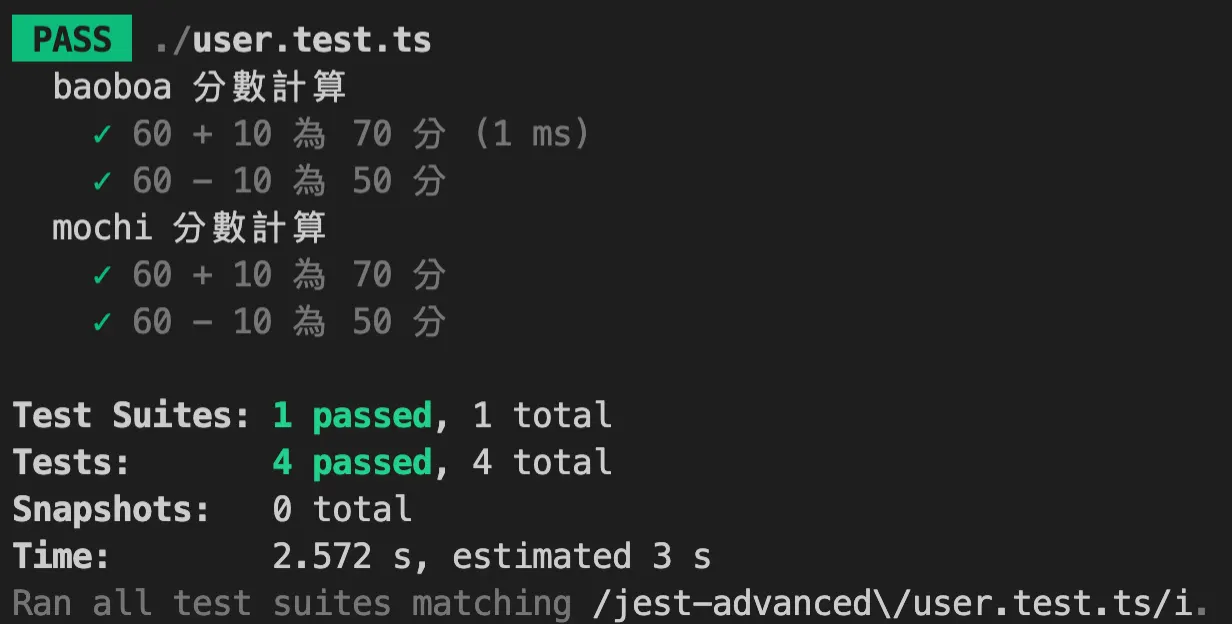
這邊補充說明一下,運行單個測試檔案的指令為: npm run test -t path/user.test.ts。
如果運行順利,就會看到下圖的測試結果嚕!
三、用 Mock Function 減少測試時的相依性
單元測試時,我們更關心「單一功能」的正確與否;如果一個單元測試涵蓋太多函式,那在發生錯誤時,我們很難判斷到底是哪一段發生錯誤。
- fetch.js:我們透過「fetchData」呼叫外部 api,而「hideComplete」是設計用來隱藏已完成的 todos。
import axios from "axios";
export async function fetchData() {
  const response = await axios.get(`https://jsonplaceholder.typicode.com/todos`);
  return response;
}

export function hideComplete(data) {
  data = data.filter(function (value: { completed: boolean }) {
    return value.completed === false;
  });
  return data;
}
- fetch.test.js:為了減少相依性,我們不希望直接呼叫真實的 api,所以透過
jest.mock將 axios 給 mock 起來;並透過 3 種情境測試:「有成功換成模擬資料、資料格式符合預期、獨立測試 hideComplete 函式」。
import { fetchData, hideComplete } from "./fetch";
import axios from "axios";
jest.mock("axios");
const mockedAxios = axios as jest.Mocked<typeof axios>;
// 模擬我們期望收到的資料結構
const data = [
  {
    userId: 1,
    id: 1,
    title: "task 1",
    completed: false,
  },
  {
    userId: 2,
    id: 2,
    title: "task 2",
    completed: true,
  },
];

test("確認結果被替換成模擬資料", async () => {
  mockedAxios.get.mockResolvedValue(data);
  const result = await fetchData();
  expect(result).toEqual(data);
});

test("驗證資料格式", async () => {
  mockedAxios.get.mockResolvedValue(data);
  const result = await fetchData();
  expect(typeof result[0].userId).toBe("number");
  expect(typeof result[0].id).toBe("number");
  expect(typeof result[0].title).toBe("string");
  expect(typeof result[0].completed).toBe("boolean");
});

test("測試 hideComplete 函式運作", async () => {
  mockedAxios.get.mockResolvedValue(data);
  let result = await fetchData();
  result = hideComplete(result);
  expect(result[0].completed).toBe(false);
});
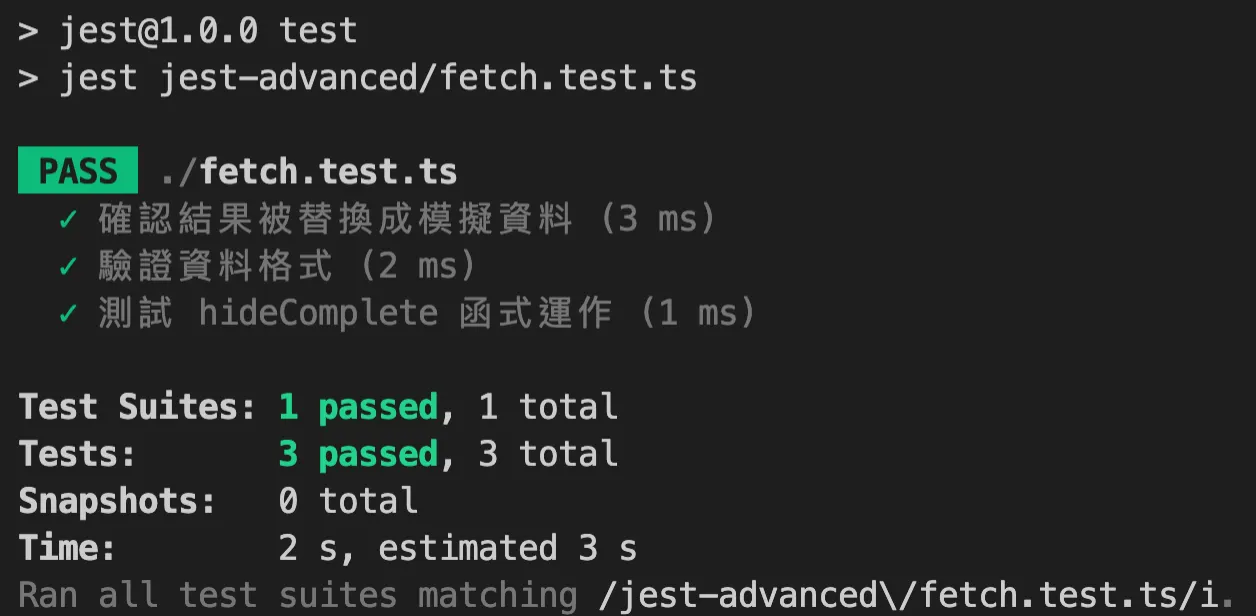
輸入npm run test -t path/user.test.ts後,如果順利就會看到下圖的測試結果嚕!
四、VSCode 的 Jest 外掛
每新增一個測試就要跑一次 npm run test 是不是很煩?如果想獨立測試某個檔案還要先確認文件路徑真的讓人心累 😨
但好在 VSCode 有「Jest」這個 Extensions 讓我們事半功倍。
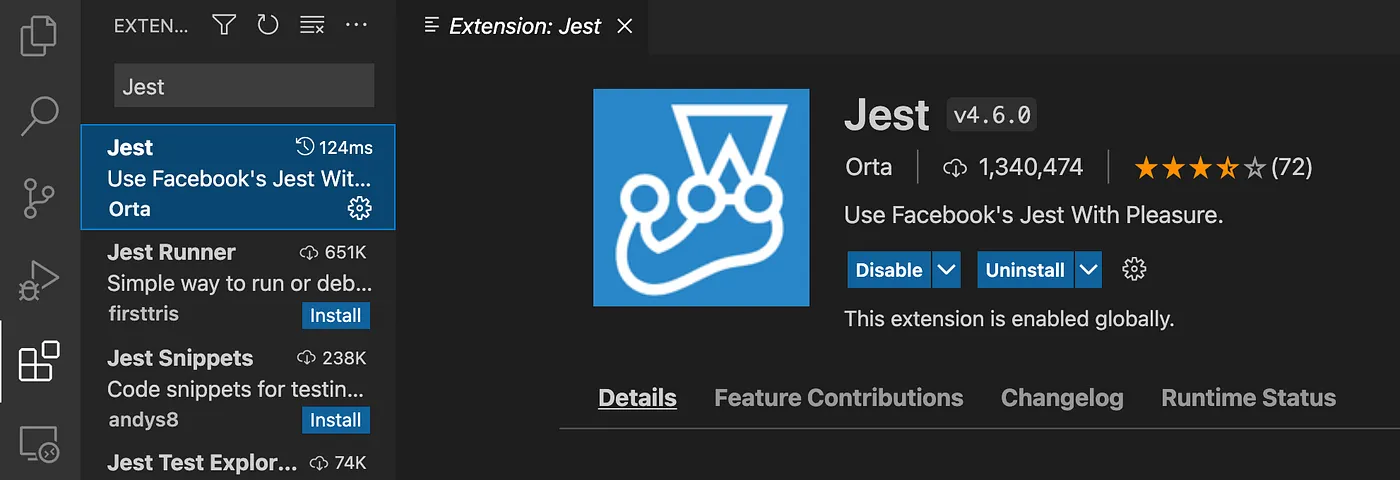
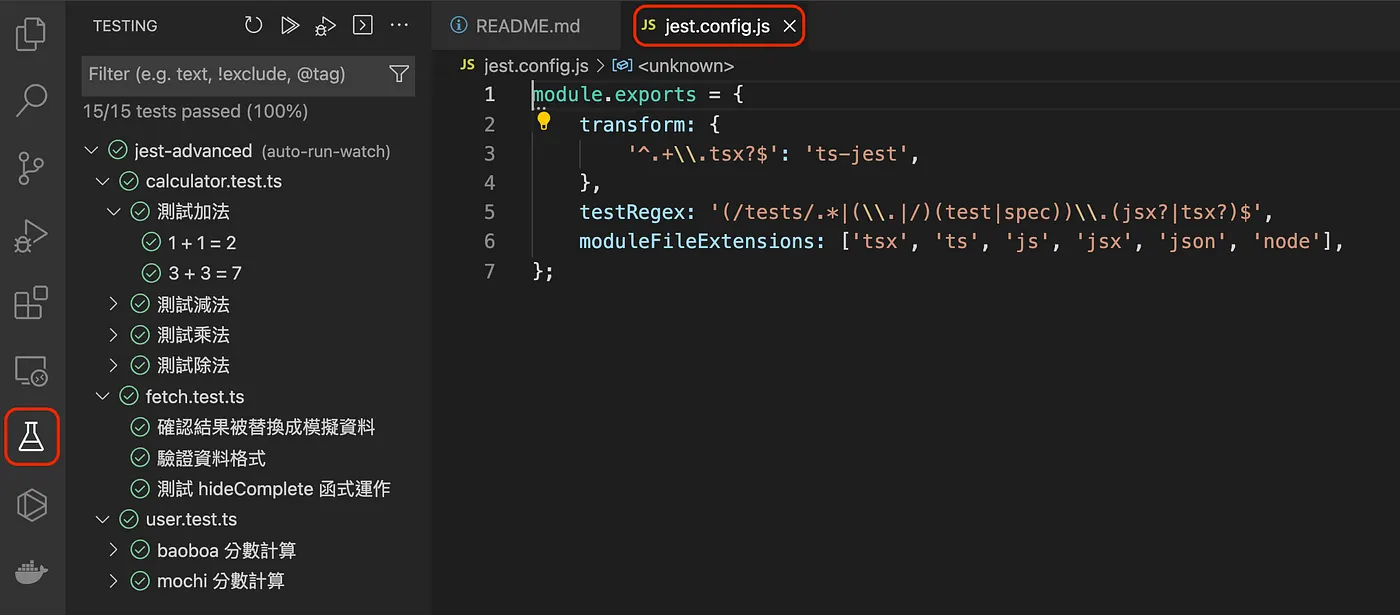
安裝完成後,VSCode 的左側會多出一個「Testing」的 icon,只要你在專案下有設定 jest.config.js 就會出現(如果還未設定可以參考上一篇文章)。
在 test 文檔左側即可看到測試成功的「v」與失敗的「x」。
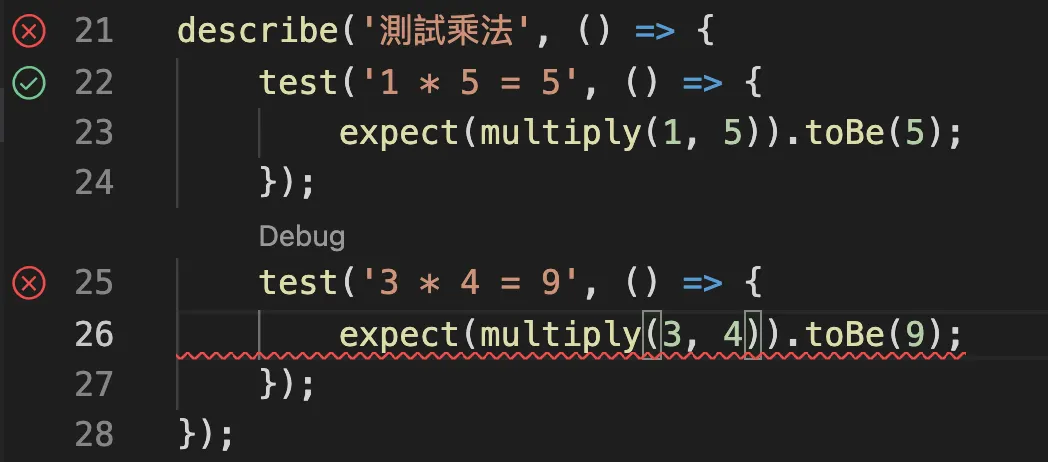
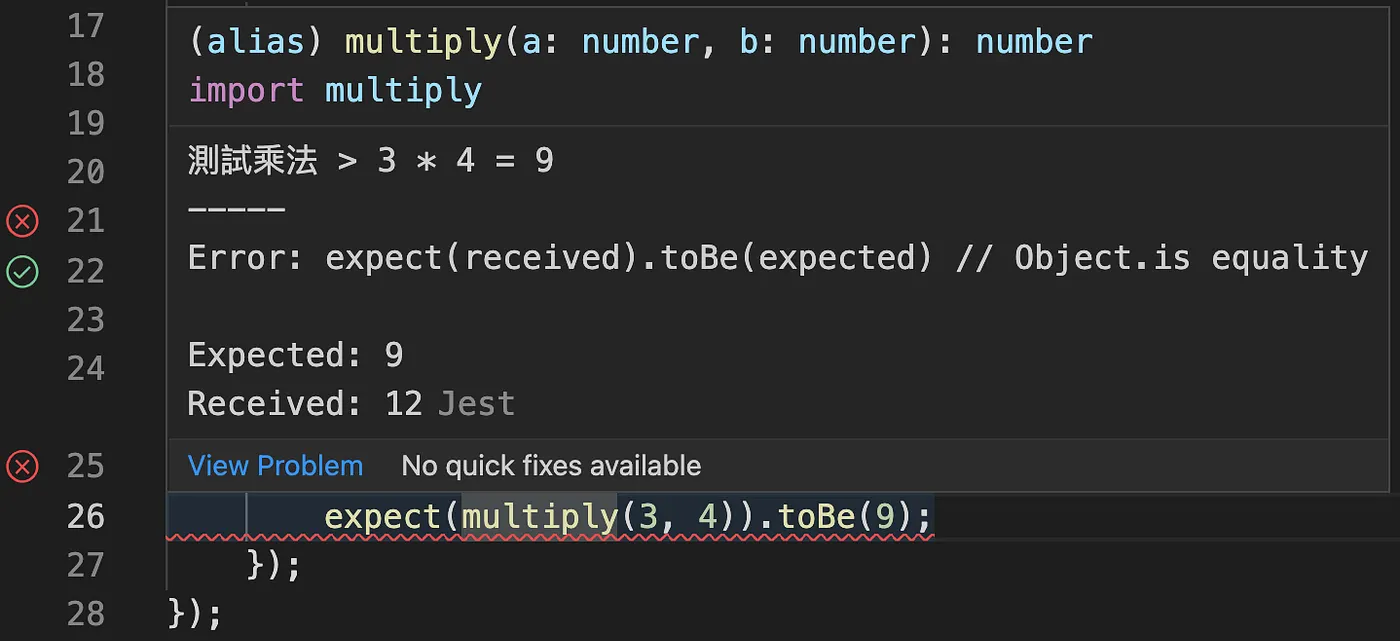
失敗的測試會在 expect 下方出現紅色底線,滑鼠移過去就會顯示預期值(Expected)與接收值(Received)的差異。
備註:身邊有朋友在安裝外掛後遇到了一些奇怪的 Error 無法正常使用,重開 VSCode、看官方文檔怎麼調整都無用,最後用大絕「重新開機」就正常了
常用的 Jest 應用就介紹到這邊,真的要自己動手實驗過才會理解裏面的原理喔!
前端單元測試 替前端專案導入測試:學習地圖、Jest 基礎與進階,再到 Vuetify(Vite & TypeScript)中的 @vue/test-utils。 林鼎淵 Dean Lin


留言載入中…